Hairstyle
Step-by-step tutorial: victory rolls
Victory rolls were big news during the 40s, however they’re now seeing a massive revival. This retro look creates a sophisticated and feminine feel. The vintage-looking hairstyle was named after a manoeuvre made by fighter jets during the Second World War and is perfect for all hair types. Learn how to style this look, step-by-step.
Step 1: Create a centre parting, then create another parting, diagonal to your first. Your second parting should begin from the middle of your side parting, and should travel to your ear, to create a semi-circle shape. Tie the rest of your hair out of your face whilst you style the front.
Step 2: The front section of your hair needs to be backcombed. To do this, spray a generous layer of hairspray, then backcomb with a bristle brush to create volume which will stay up all on its own.
Step 3: Next, take a curling wand and wrap your backcombed section around it, curling the length. Release, then brush out to remove traces of hairspray.
Step 4: You can now start to create your victory roll! In the direction of your curl, wrap the lengths upwards inside themselves, securing into place with hidden bobby pins.
Step 5: Create your second victory roll on the opposite side of your parting. This roll should be smaller than the last and flow in the opposite direction. Repeat the process, then pin discretely into place.
Step 6: Once you’ve completed your two victory rolls, tie up the rest of your hair into your desired style. A braid or even a low-slung ponytail are perfect.
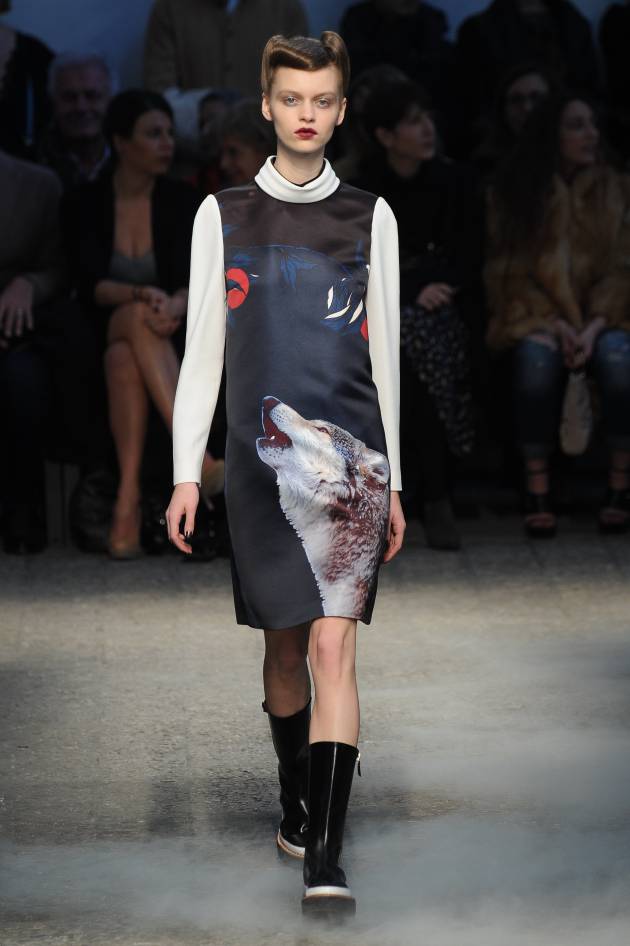
© Pixelformula / Antonio Marras prêt-à-porter runway, Autumn-Winter 2014-2015 © Jean Louis David
Not to be missed
-
 Hairstyle New: Urban Style Perfect Curls
 -
 Hairstyle Fringes come in all lengths
 -
 Hairstyle Focus on Japanese straightening
You would also like...
-
 Hairstyle Spring ponytail
 -
 Hairstyle Crimps for a retro hairstyle
 -
 Hairstyle The wet look, still stylish
 -
 Hairstyle Give me wavy hair, quick!
 -
 Hairstyle The timeless long bob
 -
 Hairstyle The ballerina bun
Most read
-
 Hair colouring What are the differences between streaks and highlights?
 -
 Hair colouring How do I choose between coloring and highlights?
 -
 Damaged hair Why does my hair look fluffy?

 France
 Spain
Spain
 Italy
Italy
 Polska
 Portugal
 Mexico
![[EN] Jean Louis David [EN] Jean Louis David](https://www.jeanlouisdavid.us/app/themes/jld/dist/images/svg/logo-jean-louis-david.svg)
